Sunday, 24 November 2013

Intentions

Intentions - Final Tutorial And Overall View Of The Brief.

After my final tutorial with Lynn, I stopped panicking a bit about my work as she put me at ease about what I had done. She helped me pick out my samples to display and gave me some last minute tips about what I have left to do. It was really good seeing everyones final work all come together and to see how people were reacting to the end of the brief. Lynn gave me some really good suggestions on other ways that I could have pushed my work further and if we had another week, I would have defiantly gone forward with my work a bit more. 

----

Overall, I have really enjoyed this brief. I was a bit nervous at first as it was the first brief of second year and it was in our specialism subject. I believe that I have really experimented and pushed myself in this brief. I have used materials, threads and fabric that I would have never even touched last year and I think I have taken a risk where ever I could. I think that I have learned more these past couple of weeks about my own work and style than I have any other time. I think I know what I like to use, what I don't like and how far I can push myself. The best part of the brief I think has been the weekly tutorials as it gives me a chance to look at everyone else's work and almost inspire myself to push forward. It also helps with brain storming ideas and getting an opinion off other students in the same situation as you. If I had more time on this brief I could have really pushed myself on the use of line quality in my work and experimented a bit more when it came to what the line means.

Intentions

Intentions - Illustrator Workshop


I feel that after attending the Illustrator workshop that I have developed a new skill to use during my course. However I did find the software very difficult to use as it is something I have never come across before, hence all of the note taking. It is something that I would like to revisit and learn more on in the future, but for now I shall stick to photoshop.


Intentions

Intentions - Irish Workshop 


I really enjoyed the Irish workshop on how to use the machine. I did find it a bit tricky at first as it is quite an old machine to use. However, I did find the machine to be a bit limited in what I can do on it. For what I want to focus on, machine drawing, I think that it will come in handy at some point in the future. 

Intentions

Intentions - Sampling - Applique


After creating the water dissolvable fabric sample I decided to move onto something that would give me some colour, but nothing too harsh, almost hints of colour. During a tutorial, Lynn mentioned about appliqué samples to another student, when looking at them I felt they would fit perfect in my brief. I decided to give it a go. These sample are make using the same top fabric, a horrible shiny silver colour that I bought online, but I think it fits well with my brief on the buildings. The sample on the left is exposing bright colours and the sample on the right is exposing brown fabrics. I actually really like these samples. Again it fits in well with my distorting image and making it unrecognisable. 

Intentions

Intentions - Sampling - Water Dissolvable Fabric


After experimenting with trying to add colour to water dissolvable fabric using stitches. I tried adding colour instead by using strips of fabric. I really liked the samples that I created using the red and yellow thread but I wanted to take that idea further and try something new. I choose really bright colours to try and make these sections stand out more and be the first thing that you notice about this sample. What I also like about this sample is that it keeps with the theme that I have been experimenting with about morphing and distressing the image to make it almost un-recognizble. 


I liked the water dissolable fabric so much and the sample that it gave me that I decided to re-create the sample but using patterned fabric so that it stayed solid. I picked the brightest fabric I could find to be the backing fabric as I felt that if I used to at the front you wouldn't, at first, notice the pattern of St Pauls. This is one of my favourite samples that I have created throughout this whole brief as I think it sums up everything I have been trying to do in one sample and I also think it sums up London perfectly, almost like the landmarks are the first thing you see (which aren't always great and exciting to look at) but when you look further, you see this bright, vibrant city.  

Intentions

Intentions - Sampling - Changing The Image


After experimenting with photoshop and the dissolvable fabric, I thought about what I really liked most about these images/samples and it was the fact that the image was no longer a solid, rigid image. It had been distorted so that it was barely recognisable. This is something I really liked.
With this sample, I tried to keep the line quite think so that they moved around and were manipulated when I washed the fabric away. I really like this sample as you can only just tell what the image was beforehand. 
I also like the mix of colours, the dark, building like colours, then to the bright red and yellow (which I took from the colours used on the London Underground Tube Map) I think it gives the sample something else, as it's not just in the boring greys and browns that I have been sticking too in my past samples. 


Monday, 4 November 2013

Intentions

Intentions - Tutorial - 4th November 2013

Some notes I took during the tutorial

Today, I had a tutorial with Lynn about my brief so far. For the first thirty minutes I was the only person there, which worked in my advantage really as I had time to really talk about my work and gain ideas and inspiration. I found I came away from the tutorial with a clear path of work that I have to do. I was feeling a bit lost at first but Lynn has given me some good things to think about. The main things that we discussed was -

- Experimenting with stitch -> trying to be a little bit more adventurous with the stitch, rather than it just being straight. Use different machine feet such as the tailor tack foot or the cornely machine.

- Scale -> what happens if I were just just focus on one section of my visual research and blew it up to a huge scale. Creating samples on a much larger scale to try and experiment with detail

- Line Quality -> What happens if I were to building the line up. Adding threads on top of machine stitch. Using different threads when creating hand embroidery samples, what about paper threads, thick wools, string.

- Experiment -> to experiment with things, try not to feel like I'm too closed in and to become more free. Not to be afraid of things not working out.

I found this tutorial very helpful and feel like I know what to do with the rest of my brief. I was starting to feel a little stuck with my samples but having had my tutorial with Lynn I feel a lot more confident. 

Intentions

Intentions - Photoshop

These are some of the photoshop experiments that I have done.

Unfortunately, I could not make it to the timed session as I was quite poorly. So after my Illustrator workshop I asked the tutor who was running the sessions what to do and she suggested that I follow the handbook that was given out and to have a play around myself and see what I could do on my own. I downloaded a Photoshop trial on my laptop and decided to have a play around myself. 

I found this very easy as I could go at my own pace and play around with all the different tools. I did find it hard at first as I had never used Photoshop before so everything was brand new to me. However after a few times playing around I found my way and begun creating some really interesting samples. As I was teaching myself how to use the program, I did struggle a bit when things went wrong (for example the sample on the bottom left was an accident, I was trying to layer an image and it came out stripy) however it was just a case of experimenting and seeing where I got too. I found it a lot easier to use the shortcut keys rather than the mouse as I knew what to do rather than clicking all the different buttons. For example when opening an image I found it a lot easier to use the shortcuts -
(as I have a mac) 
cmd+ O -> Open and image
choose the image that you want
cmd + A -> Select the whole of the image
cmd + C -> Copy
cmd + W -> shut the image down
cmd + V -> paste the image
I really enjoyed experimenting with the magic wand tool. This allowed me to crop down and image and cut out the sections that I didn't want. At first I had no idea what to do with this tool and every time I was trying to crop and image the wand just completely covered the whole image. I found it a lot easier to do each section at a time -
I highlighted a section that I wanted to erase
Then Edit -> Clear
I also found the shortcut 
cmd + D 
very useful as if anything went wrong, this un-selected anything so I could start again
and then pick another section and then repeat.
I was also experimenting with the different effects that you can add to a layer. I found that 'Multiply' made the layer become almost transparent and blend with the other layers. With the sample in the top left, I decided to add a 'Colour Burn' effect to this, which I found quite good as when you layered another layer on top it changed its colours to blend with the other layers. 
Overall, I found Photoshop a good way to experiment with images and to create different ideas quickly (more quickly when I get to grips with the tools) I would quite like to learn more in order to expand my skills and to see what else I could achieve with it. 

Tuesday, 29 October 2013

Intentions

Intentions - Samples - Water Soluble Fabric


After using acetate to create samples. I decided to try experimenting with the clear fabric idea. I thought of using water soluble fabric, such as 'romeo' I had used this before and it had always worked really well. I really like the way these samples have come out. However I did find them quite time consuming as you have to make sure your lines are very thick and all join together, otherwise the sample will fall apart.
My favourite thing about these samples are the way you can distort them as much or as little as you wish. With this sample I tried to keep it as similar to the drawing as possible.
I would quite like to take this sample idea further by loosing the thread so that it unravels. I also like the idea of layering the different samples together to create a distorted effect. 

Monday, 28 October 2013

Intentions

Intentions - Samples - Acetate 


After becoming stuck at a certain point in my brief, I decided to look back over the work that I have already done to try and find my way. The thing I liked the most and what was brought up in my tutorial was the idea of using open weave or sheer fabric to create drawings on. I liked this idea as I always prefer the back of samples to the front and this way, using sheer/transparent fabric shows both at the same time. I order lots of different examples of sheer fabrics online, so for the time being I decided to experiment with what I had to hand. I discovered that you could use acetate to stitch on, however there was a risk of it snapping my machine needle or it ripping very easily. I decided to choose this image of St Paul's Cathedral as it is one of London's most iconic landmarks. I created three different samples, each one starting off with a simple black thread drawing. I then left one empty, one with some machine embroidery onto and then another with some hand embroidery. Each one I felt was very plain and empty, I left them to one side to think about it and placed them all onto of one another. This sparked a moment for me. I really liked the layers all mixing together to crete one sample. I think this relates to my brief perfectly as, when flicking through my visual research the amount of drawings/photographs that get created of St Paul's Cathedral each day,


Intentions

Intentions - Samples - Things Going Wrong


This week, 14th October 2013, has been a very unproductive week for me. I have been suffering from a very bad case of a cold. Unfortunately, this meant that I could not attend the Photoshop workshop. This is something I really with that I had gone to as I have never really been taught the proper way to use photoshop and I think I could have created some really interesting ideas.
I also have become a bit stuck with my samples as well. I feel like i'm jarred at a certain point in my brief and just need something to push me forward. The sample above is an experiment that I did with machine drawing onto white velvet. I think this sample sums up the bad week that I have been having. The sample is all wrong, the fabric kept becoming stuck in the machine, the thread sunk right into the fibres and became almost unnoticeable and the fabric choice is completely unrelated to my brief and wrong. 
I have decided to re-look through all my visual research and tutorial feedbacks to see if I can have a spark of creativity again. 

Intentions

Intentions - Drawing Workshops - Experiments

                                                              Make a drawing on top layers.

                             Make a drawing with your eyes shut.                         Make a drawing on top of another drawing. 

                                                                  Mark-making.                                  Make a drawing using a unrelated colour. 

These drawings are some that I carried on from the drawing workshop at home. I tried to experiment with some of the techniques that Lynn discussed in the tutorial. These are some of the outcomes. I really like this way of drawing as it makes me feel a little more loose with my work. I feel like m drawings don't have to be exactly copies of what i'm trying to draw. Instead it's about gathering as much information as possible. This is a good technique that I would like to carry on throughout other future projects. 


Sunday, 27 October 2013

Intentions

Intentions Brief - Samples


These are two samples that I was testing out. I was wondering what would happen if you used black thread on black fabric and then a light coloured thread on dark fabric (rather than the white fabric and black thread that I have been using) I really like the black on black sample as you have to look really closely at the stitches. It also forces you to feel the fabric in order to under stand what it is. I feel that this relates to my brief about London and the image I have used is just of a block of flats with offices behind them, something that the tourists wouldn't even bother to look at. I really like this idea and would quite like to experiment by starting with a layer of dark thread and then going lighter and lighter with a different image each time. I feel that the grey thread one, does not have the same effect as the black one as it looks quite plain and boring. 

Intentions

Intentions Brief - Workshops - Faggoter and Big Bernina - 17th October 2013


Faggoter Machine
This first sample is from the Faggoter machine. This machine creates a join in fabrics, the seam almost interlocks the threads and creates a sort of chain pattern. To use this machine you need two separate pieces of fabric in order to connect them together, it does not work on the same piece. When using this machine you have to use very stable fabrics, if unstable add a backing fabric to it. It also needs to have a very stable and strong thread as well as it it broken very easily. I found this machine very interesting to learn how to use however what it can do is very limited. I think that it is a good thing to know how to use though as you never know when you are going to need it. 


Big Bernina 
The Big Bernina machine creates a zig-zag stitch that can vary in width. When using it you need, just the faggoter machine and very strong fabric, or a backing fabric if weak. I found this machine very interesting and could see it fitting into my brief nicely. The Big Bernina is good for creating repeat patterns as well.
I created a little guide on how to thread up the machine; 
1. Connect the thread to the stand going from back to front, do not let your thread get tangled.
2. Thread through both holes of the large pin onto of the machine, again going top then bottom.
3. Take the thread through the guide hole above the tension ring.
4. Wrap round underneath the right tension ring.
5. Take the thread down towards the disc underneath and over the small wire spring.
6. Take it up through the guide hole of the lever.
7. Take the thread down towards the needle and pass it behind the guide pin.
8. Then through the guide at the front.
9. Finally, thread the needle, making sure there is no other threads in the way or blocking the bobbin. 


Intentions

 Intentions Brief - Samples 


These are some samples that I created after having a tutorial with Lynn. I took her advice and tried to experiment by using different fabrics. I decided to use some linen scrim as during the first year, I really liked this fabric as you could easily do hand stitch on it and it has quite an open weave. I still stuck to the same technique as my last samples by using a simple black out-line. I again felt that these were a little plain so I decided to add some hand stitch onto. I chose to do one with bright colours thats stood out and then one with colour that were quite nature and that blended with the fabric. I decided to use the bright colours on the image of the o2 Arena as its very well known, bright and full of lights whereas as a contrast I decided to use the natural colours on a image of a bridge that goes over the thames as it's quite un-noticed with tourists and not many people pay attention to the lesser known things in LondonI really like how these have turned out, however I did find it a bit hard to do machine embroidery on the fabric as it is quite loose and very easy to loose control of it. 

Intentions

Intentions Brief - Tutorial - 10th October 2013

Today, I had a group tutorial with my new embroidery tutor, Lynn. There were five of us in the group, we each showed our work and chatted about what our brief is going to be about and what ideas/samples we had done so far. I really enjoy taking part in group tutorials in order to see where everyone else is with their brief and how each person is experimenting. I also like that you can bounce ideas of each other and take inspiration from other peoples work. 
Lynn discussed with me about my samples and how to experiment a bit more. She suggested that I try new materials and fabrics instead of just sticking to the black on white that I started off with. She also mentioned to try and experiment with larger samples, rather than sticking to the little pieces of fabric. She also gave me some cards to look at in order to expand my drawings and experimenting with different techniques in order to become a bit looser with my drawings -
make a drawing a long drawing
make a drawing using 5 coloured pencils
make a drawing using only 20 lines
make a drawing out of collage
make a drawing on folded or crumpled paper
make a drawing using transparent paper
make a drawing every 5 minutes for 60 minutes
make a drawing on a dark background
make a drawing on photographs
make a drawing with your eyes shut
make a drawing using the opposite hand
I found her input and everyone else's so helpful and it's sparked lots of ideas for me to run with. 

Intentions

Intentions Brief - Samples


These are some of my starting point samples that I created in order to launch my into my brief. These samples are taken from my drawings that I collected whilst in London. I tried to pick images that are instantly recognisable as London, for example the Tate Modern (top left), St Paul Cathedral (top right) a red postbox (bottom left) and the millennium bridge and the shard (bottom right)
I created this samples to carry on with the samples that I made over the summer. I created these using white fabric with a black thread and using machine stitch. When I finished them, I thought that they look quite boring, with a simple line drawing and no colour. I decided to add some colour by hand stitching over the top of them in the appropriate colours, ranging of heavy stitching on some samples to a really light stitch on others. I tried to add as many different types of hand techniques thats I could do, for example french knot, cross stitch and chain stitch. I think it has worked very well in adding colour as well as texture and mark making into my work. 


Intentions

Intentions Brief  - Subject Matter


After collecting lots of visual research over the summer and the drawing workshop that I attended, I decided that for my 'Urban Influences' brief that I would choose the subject matter of London. Having spent a lot of time in London during the summer, I thought that it would be a good choice for my brief to focus on. I love London and everything about it, from its busy underground to its historic landmarks. I think it's a good choice to focus on as there are so many different aspects of London that it is hard to become stuck on one thing. I think that I can produce a good variety of work from this subject matter without becoming bored or stuck in a continuous loop. I plan to look at the buildings and architecture of London and try and mix them together with the unseen side of London, the underground. I will do this by creating a range of samples in order to help my ideas move along and progress. 


Intentions

Intentions Brief - Artist Research 


This is an artist that I found on Pinterest whilst researching for my brief. The artist Sophie Miller is a textiles student (there wasn't much information about her that I could research) What I really love most about Sophie's work is the playfulness she has with texture and surface. Miller uses lots of different threads, wool and materials to build up the surface. This mixture of media makes the picture seem to have lots of different layers. From studying her work, she starts off with plain white fabric with a simple outline of black thread, which I think she does on the machine and then starts to build up her work. I really like the mixture of stitches she uses as well, mixing machine and hand stitching so well that each one blends perfectly together.
I really like Sophie's work and this is something I would really like to experiment with in my own work. She takes influences from the urban landscape, using the textures and shapes of the buildings rather than the outline and a straight copy of what she sees, this is something I have been trying to create. I really like the idea of mark-making, especially with stitch and I think Sophie's work is very inspirational for me.  


Tuesday, 8 October 2013

Intentions

Intentions Brief - Drawing Workshop

For part of my Intentions brief I took part in a drawing workshop. I've begun to feel a bit like i'm producing the same drawings so I thought this workshop might help. I really enjoyed the workshop all in all, it taught me that your drawings don't have to be perfectly detailed and represent what you are trying to draw, its all about the information you get into the drawing.
 For my object, we had to pick something that represented our brief. I decided to choose a shoe and a toy model of big ben, I think this related well to my travelling/journey idea. 


This image was one of my favourite exercises in the workshop. We set up our objects, paper and drawing equipment, then moved to another desk and drew another object. We then moved back, drew our own, then swapped over and someone drew on top of our drawing. 
  I really enjoyed this part of the workshop as it made me feel a little bit less precious about my work. I felt less scared to start my drawings as someone had already worked onto the page first. 
The layers I made from this is something I really liked and i'd like to try it in my own drawings. 


This is the joining piece of work to the above piece.
This is someone else's drawing that I drew on top of. I really like the style of this drawing, especially the bright red chilli against the pale background and then the really detailed black drawing on top, again this is another layers. It was really hard to draw on top of this drawing as I didn't want to hide someone elses drawing, but it was a good experience.


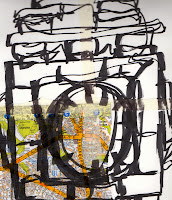
 This image is of my drawings of big ben. I really liked the layering idea, so I decided to draw onto acetatee. I really found it hard drawing on this different material as it was difficult to try and not to smudge it. I think it has come out really well. 
I think i'll use this image again and again, layering it on top of different materials and papers. I also like the idea of adding stitch over the top, adding another layer. 


  Amy's version of my object.                                                 My drawing of big ben, with Amy's drawing on top

These are some images that I created and then swapped with Amy, who then added her own drawing on top. I really like these drawings as our drawing style is very similar so it was quite unusual to see what we did to each others work. What I like most about these drawings is the different styles that have been mixed together. On the right hand image, I would have never thought about using oil pastels added to this drawing.